The Clay Dry

‘Quarry Maid’ shunts the clay dry.
Looking back through the Blog, realise that I’ve not written about the Clay Dry buildings since January. After the hiatus caused by the events of early summer, followed by summer holidays, recent weeks have seen me making good steady progress with the Clay Dry buildings and they are now finished.
These form the main group of buildings on the layout and very much set the scene, so their completion feels like a milestone.
The configuration of buildings is very much inspired by that on Iain Rice’s ‘Trerice’ layout with design being led by photos of older clay drys found in books I’ve collected or online. Albeit a fraction of the size that clay dry would’ve been, I wanted a collection of buildings that was believable and imposing on the site but without dwarfing the scene.

‘Annabel’ collects a van from the bagged clay store.
Four buildings make up the Clay Dry scene, two from kits and two scratch built. The chimney is a Skytrex casting, slightly reduced in height. The second kit structure is a Parker’s Lock Up building from Petite Properties that just happened to fit the area perfectly and with the railway siding entering the building giving the impression of the works being extended off scene.
The linhay and the bagged clay store were designed to fit the site available space with the main carcass being formed from 5mm thick foam board. A lightweight material that is very strong when braced properly. The clearances for the bagged clay store are very tight and with hindsight possibly a little too tight, but that’s the bonus of building a cameo layout, the chance to learn from my experiences.
Once assembled into a basic carcass, the linhay, bagged clay store and the lock up buildings were all covered in Slaters embossed sheets with the windows and doors cut out using the random stone sheets, with a different style of stone sheet on the linhay’s loading platform to show it as a later addition as these buildings often evolved over time. Lintels and firehole doors on the linhay were added using styrene strip.


‘Quarry Maid’ captured again whilst shunting the linhay.
For the stone buildings, on top of the grey primer I used a base coat of ‘stone wall’ a light grey, with lintels and some stones picked out in ‘S. Europe mud’ And finally some moss growth picked out in a colour wonderfully titled ‘dunkelgrun’. The origins of the names coming from military modelling.
On the linhay, the openings for extracting the clay caused an issue with seeing and needing to model the interior. In one of my books, there was a photo where the linhay openings were covered by doors hinged at the top which remained closed unless the clay was being loaded from there. Perfect, for what I wanted. A set of doors was made up from laminated styrene sheet, suitably distressed to look more like wooden doors, which were painted a fetching shade of blue, with some dry brush weathering to show where the paint would be worn away from the wood through use before fitting.
The buildings had guttering added from the excellent ModelU range, a finishing touch that really adds something to the buildings and whose omission leaves them looking rather bare to my eyes. A large proportion of china clay was once shipped in barrels and a selection of barrels from the Skytrex range dressed the platform and partially hides the open door. The use of barrel loads should also make it easier to run my wagons loaded and empty.
The chimney had the brick pattern cast into it and received a coat of white primer to pick out the mortar joints. On top of this I added some raw umber and worn brick shades lightly in a dry brushing style to allow the mortar courses to show through.
Once happy with the colours, everything was brought together with a wash of thinned black. Then another first for me, I used some weathering powders to add some soot to the chimney, some rot to the wooden doors and a layer of china clay dust to everything.
Finally, the roofs were slated. I’ve used laser cut slate strips before and found them a revolution. Having had them recommended to me, this time I used weathered skates from Scale Model Scenery. Stuck on with card glue, the area of the linhay made me question my sanity a little, but not as much as if I’d cut each slate out individually. The weathering is a good touch and saves one other job, just needing a dusting of white weathering powders to simulate the clay dust.
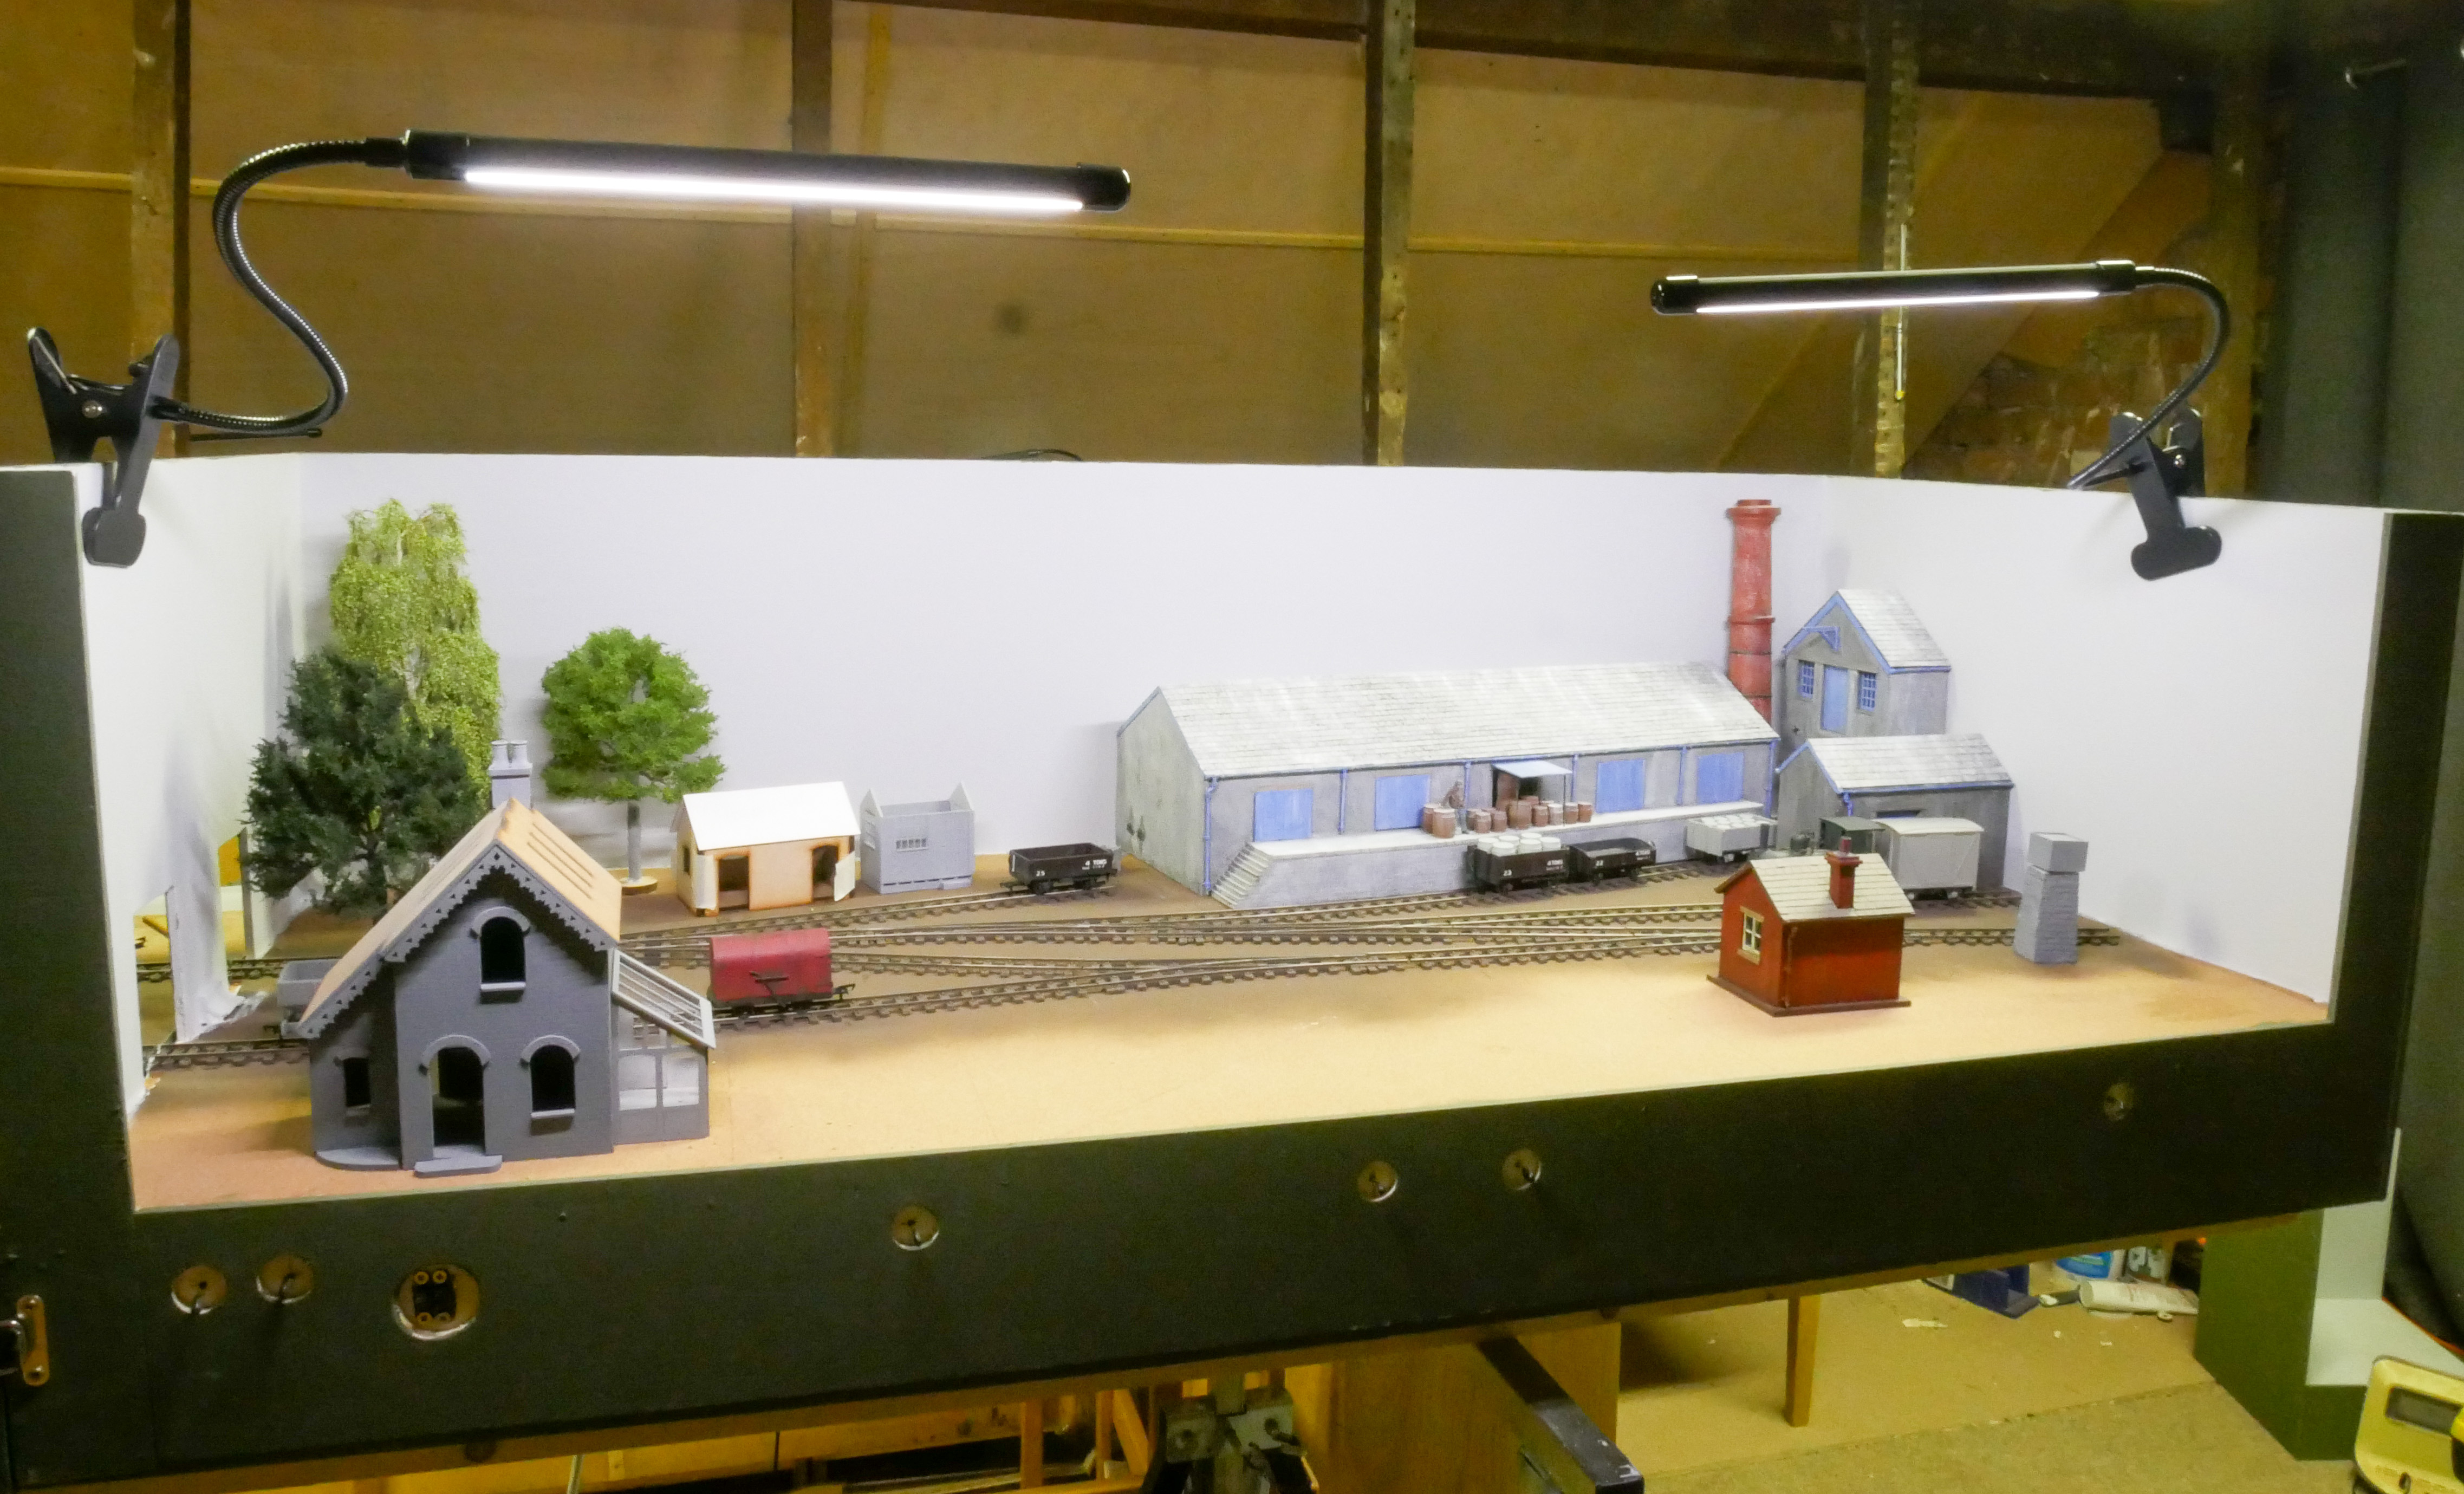
The overall scene.
Overall, I’m really pleased with how these buildings have turned out and they’ve aided me learn some new techniques which is another plus. They, along with some trees (from Primo Models) add some much needed colour to the layout. They won’t be fixed in until I’m ready to start on the final scenic treatment. When I come to fix the linhay down, suspect that the store for the linhay may well get some form of weather protection made out of rickety timber and wriggly tin, but will be built in situ when I can picture just how big it will be. Can see some running of trains will take place before I move onto the next building.

‘Sir Jasper’ arrives with a passenger train. Finishing these carriages is one of the many jobs still to do.
Note: The manufacturers above are mentioned from being a satisfied customer, no other connection.


Comments
Post a Comment